SET APP DEFAULTS
In this screenshot you can see that the choices for sending a message are the stock SMS app, or Handcent SMS. To pick a default app, tick the Use by default for this action option and then choose whichever you wish to use.
REMOVE APP DEFAULTS
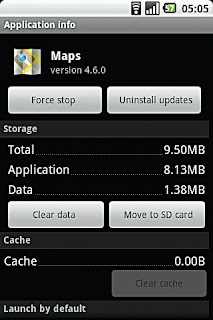
Go to Settings > Applications > Manage Applications. Choose the app you want to alter and scroll down the Application Info screen until you see the Clear Defaults button. Touch this to reset the default status of the app.
MOVE TO SD CARD
REMOVING APPS
 Most apps take up just a few MB of space in your phone memory, so most modern Android phones can fit a lot of apps inside them before they start to run out of space. If, for whatever reason, you wish to remove an app, the process is simple.
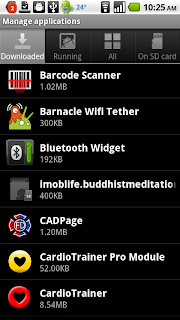
 Go to Settings > Applications > Manage Applications. The tabs at the top will show you Downloaded Apps, Running Apps, All Apps and Apps on SD Card. The tab titles are fairly self explanatory, so for now concentrate on Downloaded Apps.
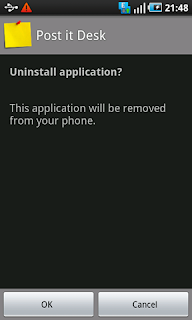
Select the app you wish to remove and then touch the Uninstall button. Confirm that you want to remove the app on the next screen and click Ok. If uninstall a paid app and then decide you want to reinstall it, you will be able to download it again from Google Play for free.
CHECK FOR APP UPDATES
Open Google Play on your phone and open the My Apps screen from the tabs at the top of the page. If the problem app has "Update" next to it, click on it and choose Update from the next screen. It is also worth ticking the Allow Automatic Updating option so that you keep up to date with future updates.
FIX PROBLEM APPS
Go to Settings > Applications > Manage Applications and select the Running Apps tab at the top of the screen. Have a look to see if the app is shown as Running (if not, select the All Apps tab) and select it to see the Application Info screen.
FORCE STOP
This might sound worse than it actually is. It simply forces the app to stop running. You can then try running the app again to see if it works properly.
CLEAR CACHE
 If the app still doesn't work properly, try clearing the cache. This removes files and data that the app has stored to help it run smoothly. No essential data will be lost when you Clear Cache. Go back and try running the app again.
CLEAR DATA
Your third option, if the app is still not working as it should, is Clear Data. This is more drastic (for the app) than clearing the cache and will remove stored password and settings. This basically restores the app to its original state when you first installed it.
UNINSTALL
The fourth button on the App Info is self-explanatory. If nothing else has helped, uninstall the app and download it again.


